Controlling the On-Board RGB LED with Microphone
Learn how to create a soundmeter using the built-in microphone on the Nano 33 BLE Sense.
In this tutorial we will use an Arduino Nano 33 BLE Sense board to measure and display the sound values of your surroundings, made possible by the embedded MP34DT05 sensor.
Warning: A very small percentage of people may experience a seizure when exposed to flashing lights or patterns. Even people who have no history of seizures or epilepsy may have an undiagnosed condition that can cause these “photosensitive epileptic seizures” while watching lights blinking fast. Immediately stop and consult a doctor if you experience any symptoms.
Goals
The goals of this project are:
- Learn how to output raw sensor data from the Arduino Nano 33 BLE Sense.
- Use the PDM(Pulse-density modulation) library.
- Print sound values in the Serial Monitor.
- Create your own RGB sound meter.
Hardware & Software Needed
- Arduino Nano 33 BLE Sense.
- This project uses no external sensors or components.
- In this tutorial we will use the Arduino Web Editor to program the board.
The MP34DT05 Sensor
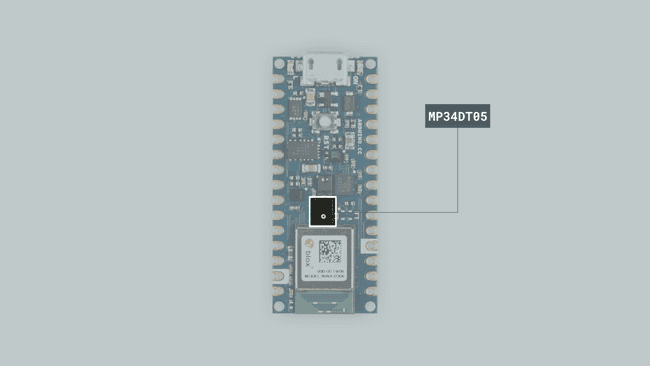
Microphones are components that convert physical sound into digital data. Microphones are commonly used in mobile terminals, speech recognition systems or even gaming and virtual reality input devices.
The MP34DT05 sensor is a ultra-compact microphone that use PDM (Pulse-Density Modulation) to represent an analog signal with a binary signal. The sensor's range of different values are the following:
- Signal-to-noise ratio: 64dB
- Sensitivity: -26dBFS ±3dB
- Temperature range: -40 to 85°C
If you want to read more about the MP34DT05 sensor you can take a look at the datasheet.
Creating the Program
1. Setting up
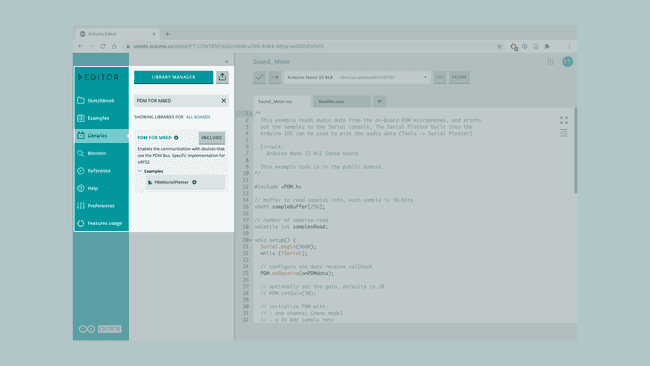
Let's start by opening the Arduino Web Editor, click on the Libraries tab, search for the PDM FOR MBED library, then in Examples, open the PDMSerialPlotter example. Once the sketch is open, rename it as Sound_Meter.
2. Connecting the board
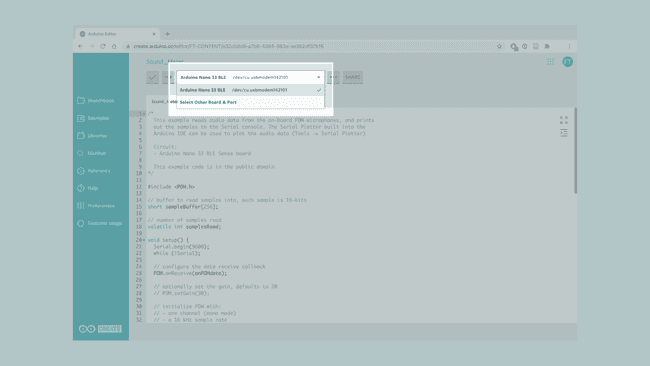
Now, connect the Arduino Nano 33 BLE Sense to the computer to check that the Web Editor recognizes it, if so, the board and port should appear as shown in the image. If they don't appear, follow the instructions to install the plugin that will allow the Editor to recognize your board.
3. Printing and displaying sound values
Now we will need to modify the code of the example, in order to print the sound values and turn on a different LED based how noisy is the sound.
Before the
setup()shortvolatile intshortsampleBuffer[256]volatilesamplesRead1#include <PDM.h>2
3// buffer to read samples into, each sample is 16-bits4short sampleBuffer[256];5
6// number of samples read7volatile int samplesRead;In the
setup()PDM.conReceive()PDM.begin()if()1void setup() {2 Serial.begin(9600);3 while (!Serial);4
5 // configure the data receive callback6 PDM.onReceive(onPDMdata);7
8 // optionally set the gain, defaults to 209 // PDM.setGain(30);10
11 // initialize PDM with:12 // - one channel (mono mode)13 // - a 16 kHz sample rate14 if (!PDM.begin(1, 16000)) {15 Serial.println("Failed to start PDM!");16 while (1);17 }18}Then, in the
loop()for()Serial.println()1// check if the sound value is higher than 5002 if (sampleBuffer[i]>=500){3 digitalWrite(LEDR,LOW);4 digitalWrite(LEDG,HIGH);5 digitalWrite(LEDB,HIGH);6 }7 // check if the sound value is higher than 250 and lower than 5008 if (sampleBuffer[i]>=250 && sampleBuffer[i] < 500){9 digitalWrite(LEDB,LOW);10 digitalWrite(LEDR,HIGH);11 digitalWrite(LEDG,HIGH);12 }13 //check if the sound value is higher than 0 and lower than 25014 if (sampleBuffer[i]>=0 && sampleBuffer[i] < 250){15 digitalWrite(LEDG,LOW);16 digitalWrite(LEDR,HIGH);17 digitalWrite(LEDB,HIGH);18 }With this portion of the code, we will turn on the RGB LED based on the amount of sound that the microphones is receiving.
4. Complete code
If you choose to skip the code building section, the complete code can be found below:
1/*2 This example reads audio data from the on-board PDM microphones, and prints3 out the samples to the Serial console. The Serial Plotter built into the4 Arduino IDE can be used to plot the audio data (Tools -> Serial Plotter)5
6 Circuit:7 - Arduino Nano 33 BLE Sense board8
9 This example code is in the public domain.10*/11
12#include <PDM.h>13
14// buffer to read samples into, each sample is 16-bits15short sampleBuffer[256];16
17// number of samples read18volatile int samplesRead;19
20void setup() {21 Serial.begin(9600);22 while (!Serial);23
24 // configure the data receive callback25 PDM.onReceive(onPDMdata);26
27 // optionally set the gain, defaults to 2028 // PDM.setGain(30);29
30 // initialize PDM with:31 // - one channel (mono mode)32 // - a 16 kHz sample rate33 if (!PDM.begin(1, 16000)) {34 Serial.println("Failed to start PDM!");35 while (1);36 }37}38
39void loop() {40 // wait for samples to be read41 if (samplesRead) {42
43 // print samples to the serial monitor or plotter44 for (int i = 0; i < samplesRead; i++) {45 Serial.println(sampleBuffer[i]);46 // check if the sound value is higher than 50047 if (sampleBuffer[i]>=500){48 digitalWrite(LEDR,LOW);49 digitalWrite(LEDG,HIGH);50 digitalWrite(LEDB,HIGH);51 }52 // check if the sound value is higher than 250 and lower than 50053 if (sampleBuffer[i]>=250 && sampleBuffer[i] < 500){54 digitalWrite(LEDB,LOW);55 digitalWrite(LEDR,HIGH);56 digitalWrite(LEDG,HIGH);57 }58 //check if the sound value is higher than 0 and lower than 25059 if (sampleBuffer[i]>=0 && sampleBuffer[i] < 250){60 digitalWrite(LEDG,LOW);61 digitalWrite(LEDR,HIGH);62 digitalWrite(LEDB,HIGH);63 }64 }65
66 // clear the read count67 samplesRead = 0;68 }69}70
71void onPDMdata() {72 // query the number of bytes available73 int bytesAvailable = PDM.available();74
75 // read into the sample buffer76 PDM.read(sampleBuffer, bytesAvailable);77
78 // 16-bit, 2 bytes per sample79 samplesRead = bytesAvailable / 2;80}Testing It Out
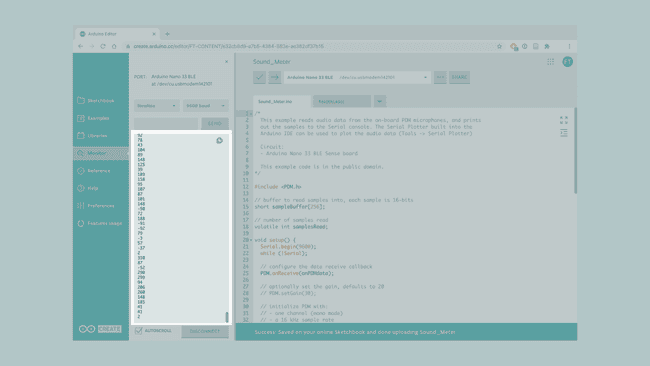
After you have successfully verified and uploaded the sketch to the board, open the Serial Monitor from the menu on the left. You will now see the new values printed.
If you want to test it, the only thing you need to do is to place the board next to a speaker and play some music to see how the colors of the RGB LED change based on the music.
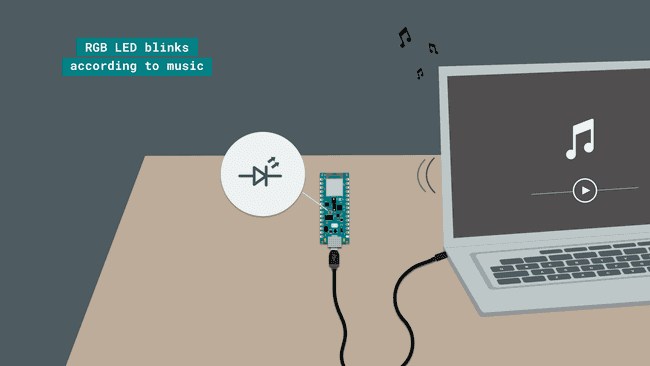
Warning: Remember that depending of the music, lights might blink too fast. Immediately stop playing and consult a doctor if you experience any symptoms of “photosensitive epileptic seizures”.
Troubleshoot
Sometimes errors occur, if the project is not working as intended there are some common issues we can troubleshoot:
- Missing a bracket or a semicolon.
- If your Arduino board is not recognized, check that the Create plugin is running properly on your computer.
- Accidental interruption of cable connection.
- The sound of the music is too low or the board is too far from the speaker.
Conclusion
In this simple tutorial we learned how to read sound values from the MP34DT05 sensor using the PDM library, and how to use the sensor embedded in the Arduino Nano 33 BLE Sense board in order to print out sound values from the environment and visualize them through the RGB LED.
Suggest changes
The content on docs.arduino.cc is facilitated through a public GitHub repository. If you see anything wrong, you can edit this page here.
License
The Arduino documentation is licensed under the Creative Commons Attribution-Share Alike 4.0 license.